Disclosure: Affiliate Links Below

Showing posts with label DIY. Show all posts

DIY Dresser Makeover Tutorial {with pictures}

DIY Decoupage Dresser


Like most kids, my son's a fan of the Avengers. So, when we decided to redo his dresser we decided on creating a decoupage Avengers dresser.

Decoupage is an easy way to create whatever style dresser you want. Since you can pick any paper or fabric for your decoupage project the possibilities are endless.

Let's Get Started!

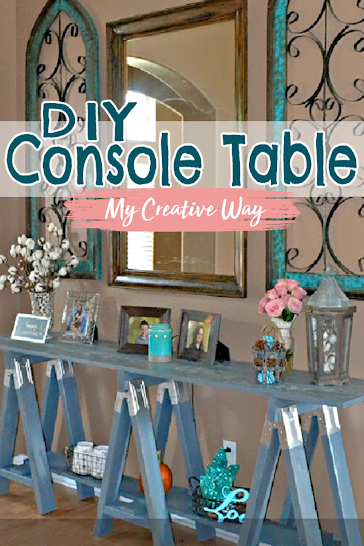
DIY Sawhorse Console Table: With Printable Plans & Supply List

DIY Entryway Table


Regardless, if you are looking for an entryway table, console table, or sofa table this Sawhorse table is the way to go. It is one of my favorite pieces in our new home and we have a sense of pride in building it ourselves, thanks to Shanty 2 Chic! 

If you're new to building items for your home, these sawhorse brackets makes this design easy, even for a newbie wood worker. 

DIY Paint Splatter Cake. 3 TIPS!

Paint Splatter Cake
 
Last summer I had the request to make a paint splatter cake. It was very simple to do. So, if you're thinking about creating your own here's my tips. For this cake I made a 6" and 4" round cake, covered them in black fondant, and splashed neon color royal icing using a knife.

DIY Pallet Dog Bed: Tutorial

How To Make A Wood Pallet Dog Bed


I couldn't take it anymore. Seeing that dog pillow on the floor was driving me crazy, so the hubs and I decided to make a dog bed out of an old wooden pallet. 

We were able to make this Pallet Dog Bed for $0!!! Yes! It was FREE! 

We had everything we needed to make this dog bed and you probably have everything too!

Teacher Appreciation PUN Gift. You're The KEY To My Success! Free DOWNLOAD!

Teacher PUN Gift IdEA

You'e The "KEY" To My Success!


I blinged out some blank keys and turned them into cute Key Chains. The kids helped and we had a great time crafting.
 
Teacher Appreciation Week is almost here!

Kids Edible Craft. Valentine Candy Melts.

Valentine's Day Lips - Candy Treats


My daughter and I made some candy lip suckers today just for fun.  It was a great craft that my 6-year-old could handle and loved to do. This is a must try for you and your kids.


You Will Need:
Change it up however you want.
I used...

 Red Candy Melts
XOXO & Lip Candy Mold
Plastic Sucker Sticks
Make N Mold Bottle

DIY Steps:
  1. Fill your Make N Mold Bottle 3/4 full with Candy Melts.
  2. Melt in Microwave following the instructions. I did 30 sec intervals.
  3. Squeeze bottle and mix candy
  4. Repeat until the candy melts smoothly
  5. Place lid on bottle and squeeze candy into molds (let the kids do this)
  6. Tap molds softly on counter tops to level the candy
  7. Place in fridge until it hards
  8. Pop out candies from mold (let the kids to this)
  9. Add a sucker stick by placing a small dab of melted candy to the back on the stick. Let the candy harded to hold the stick in place.

SUPER EASY!
 Madison squeezing melted candy into the molds.

 Jaxson sneaking and eating candy melts from the bag :)


 Dont forget to tap it on the counter to level it out and to pop any air bubbles.


Take silly pictures just for fun or to use as cards for Valentine's Day like our post from {yesterday}.


Stay Connected: MCW FACEBOOK * MCW PINTEREST * MCW TWITTER